Sunday, March 23, 2014

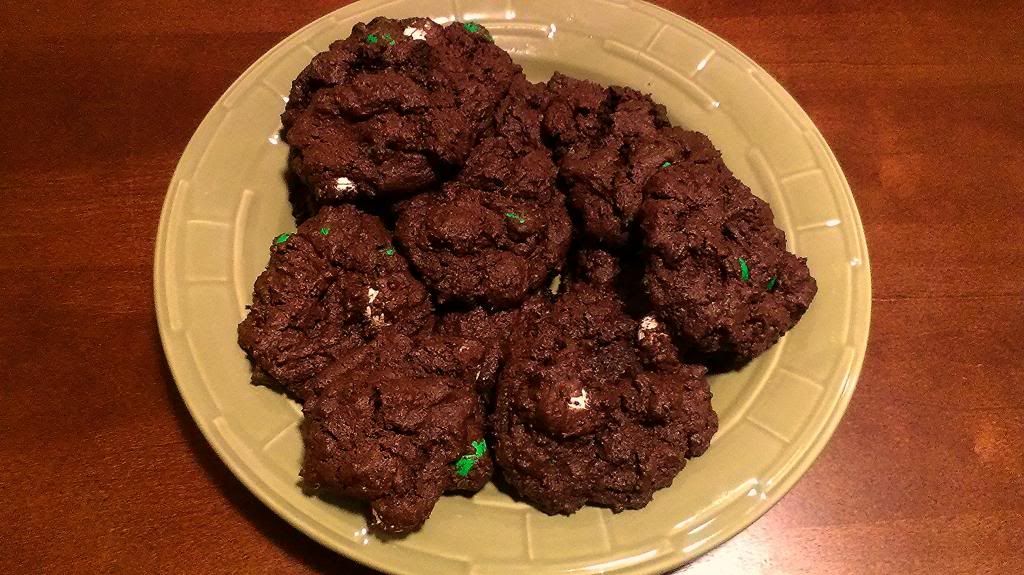
Mint M&M Chocolate Cookies

Winter as a collective whole has pretty much been devoted to food.  We figure if the weather is going to be cold and the sun goes down earlier, we might as well claim it's dessert time and keep the house warm through ovens.
This right here.  And US40 being shut down
<weather.com>
The holidays in the US are luckily closely themed in colors, I'm guessing to let it slide if the decorations for Christmas were buried under a pile of snow for Valentine's Day and are just starting to peek out for St. Patrick's Day.  Sidebar: isn't great how we can also stay warm through all three with some bar tending skills?  This also means that you are presented with the opportunity to save some money when stocking up on discounted merchandise from last season.
Hey girl hey!
It also means some poor soul will have to eat the color that is not currently in season.  Free pour for them.
Someone has to sacrifice.


Ingredients - Cooke recipe adapted from Raspberry Chocolate Cookies by Heat the Oven to 350
1/2 cup unsalted butter
1/2 cup white sugar
3/8 packed brown sugar
1egg
1/2 tsp vanilla
3/8 tsp mint extract
1/4 tsp salt
1/2 + 1/8 cups unsweetened cocoa powder
1/2 + 3/8 cups all-purpose flour
1/2 tsp baking powder
1/2 tsp baking soda
Approx a cup of mint M&Ms


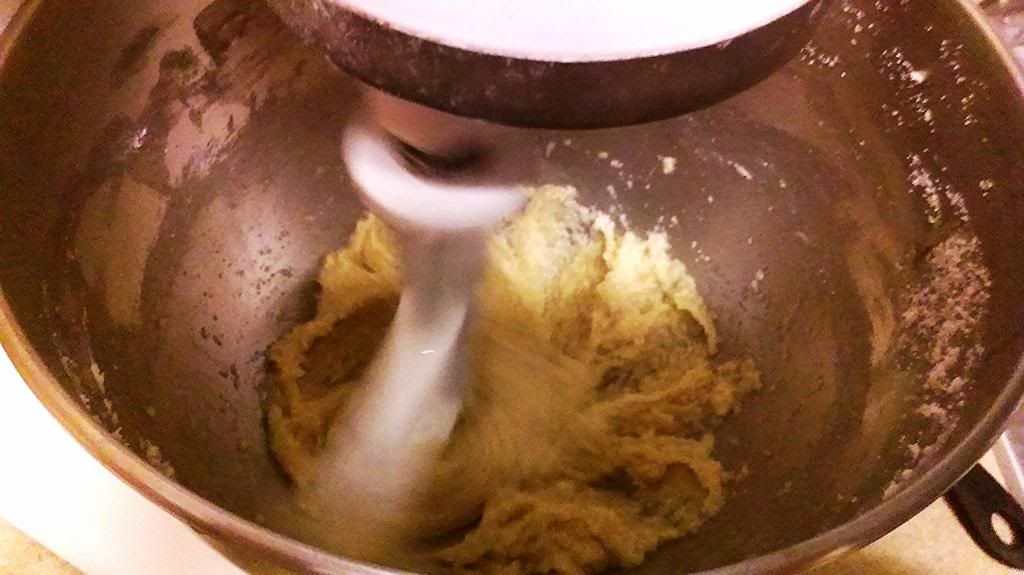
Preheat oven to 350 degrees. In a large bowl, cream together the butter, brown sugar and white sugar until light and fluffy.  Add the vanilla and raspberry extracts and then the eggs one at a time, beating well with each addition.

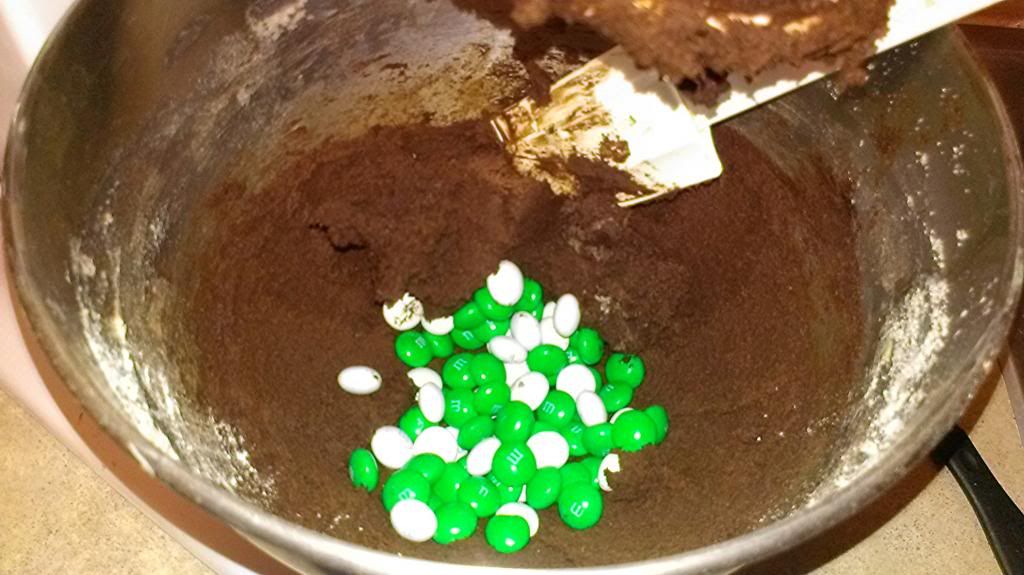
 Combine the salt, cocoa, flour, baking powder and baking soda and gradually stir into the creamed mixture.  Add M&Ms!

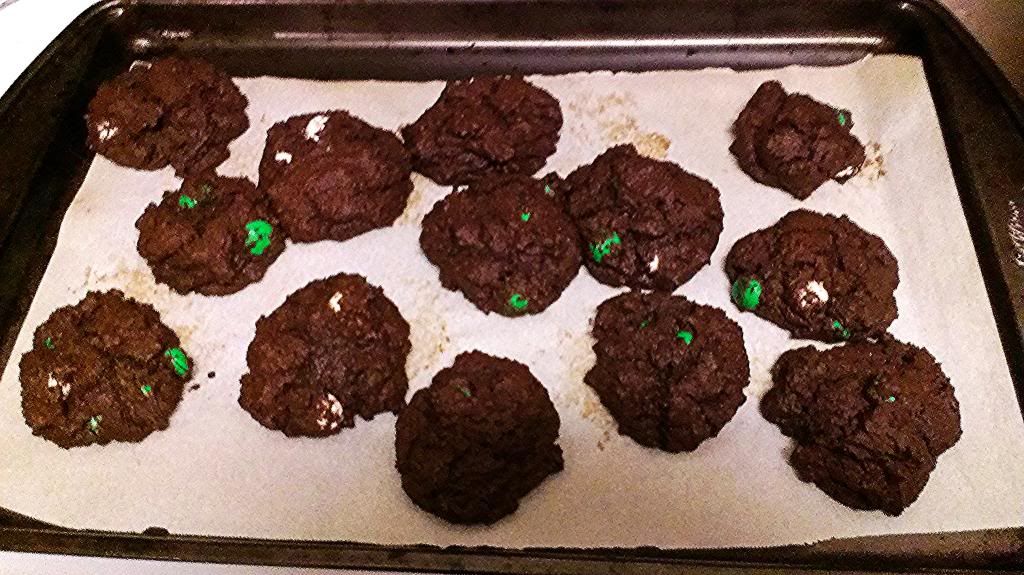
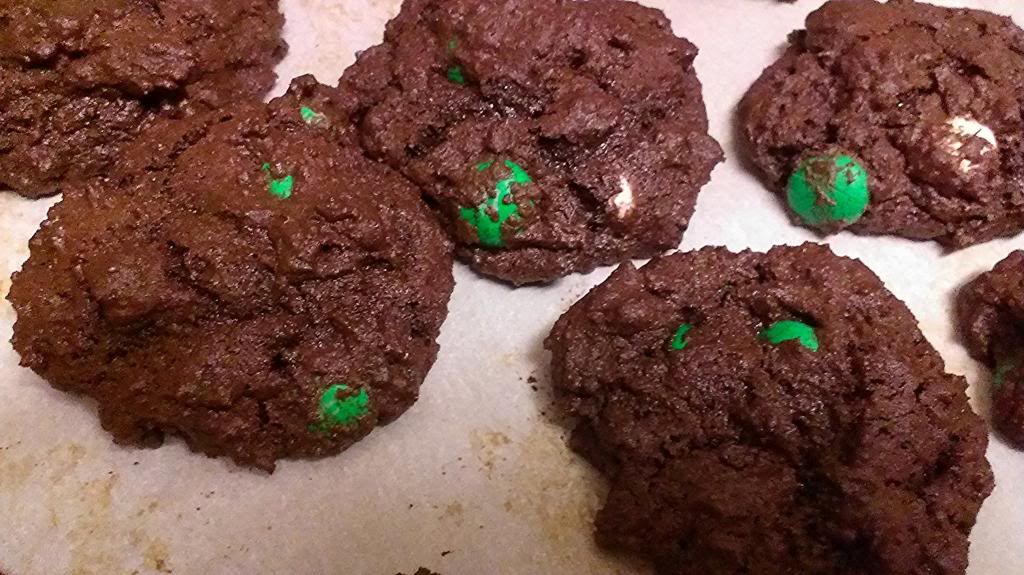
Shape dough into 1 1/2 T sized balls.  Bake 8-10 minutes or until the cookies..
 
 
Allow cookies to cool on baking sheet for 5 minutes before removing to a wire rack to cool completely.

Enjoy the various tastes of the season(s)!

</sidebar>

"Let's Cook" Kitchen Towels

There's a lot of debate around Valentine's Day/Lupercalia/Singles Awareness Day.  Countless arguments, infographics, quizzes, guides, and stock photos for and against the holiday have been thrown around.  Either way, it's a great excuse to drink.  AND for 2014-15, it's on the weekend.  Round on the house!


And it's a great excuse to give away gifts.  To everyone you love/like/like like/appreciate/tolerate.  Of course it's really because you want to try making something new.  If you're like me, I can't keep everything in my house because there's just too much.  I enjoy the process of making much more than the realization that I now have a bunch of bottle cap castings lying around, or another bag.  For the required trips to the craft store to get more supplies.  Or to Kroger.  Those gas points aren't earning themselves.

The Breaking Bad train has so left the station that it's stars are using it as a vehicle to step into their next roles.  Sidebar: can't wait to see Need for Speed, hopefully a pure racing movie that gets a video game franchise right.  I decided to share the love of cooking with both Heisenberg and my special someone with a kitchen towel.  Have to have some way to wipe all the evidence off your hands.

Let's Cook Kitchen Towels - following directions from DIY Screen Print by My Calico Skies
Materials
Embroidery Frame - mine was 9 inches
Stocking
Mod Podge
Fabric Paint
Scraper
Bar or Tea Towel

The tutorial is really good; I highly recommend following it!  Draw out your picture.  You can see my Heisenburg poking out from the back of the materials picture; I went for the iconic hat, sunglasses, and goatee.  Trace it onto your stretched frame.  Fill in around picture with Mod Podge; you don't have to slather on the glue, but it does need to be a fairly thick layer.  Let completely dry.
The shiny areas are the Mod Podge
Fill in ay holes where the glue didn't 100% fill.  Place the screen where you want your picture. I ironed the towel after folding it into 3rds to more easily see where the center of the towel fell.  After you're 100% sure of placement, lay down the paint.  There's no going back now!
You can slightly see the ironed lines on the sides of the frame.
Spread out the paint all over the open areas.  Make sure you cover all the areas with a thick coat of paint and run your scraper over the areas where there's no mask.  After you've provided significant coverage, carefully lift the screen.

You may want to fill in some spaces where there was spotty coverage or leave it rugged.  Heisenberg was a rough man, he'd approve.  Take extra paint and letter "Let's Cook" on the bottom

I also experimented with Sharpie if your lettering skills are about as awesome as mine.  I went free hand because I wanted to keep this "gritty".

Now, go whip something up.  We've got mad chemistry bro.

</sidebar>

Monday, February 24, 2014

Cuppa-cuppa-cuppas

College football holds the key to my heart, which the Hokies have done a pretty good job of breaking over the past 2 years.  I didn't eat enough Which Wich... was that it?  I'll go there right now if that will bring back the team unity and the spirit that I loved watching previously.
Which Wich Image
Seriously, how many of these will it take?
http://www.whichwich.com/sandwich/elvis_wich
While we're wiping off the wounds or celebrating the successes of last season, the big game of the league-where-our-best-go-to-disappear had this little shindig called the "Super Bowl".  So after some thoughtful consideration, I determined that this was the last chance I had to have tailgate snackage until next season. I decided to bring out the side carbine to the shoulder cannon of Pinwheels.  My family has been cooking these since I remember hating the taste of alcohol.  Luckily I've gotten over that slight handicap, and now thoroughly enjoy waiting all day for these little puppies of joy.  Or at least that's what mini hotdogs should be called.  You heard it here first.

Ingredients
1 cup brown sugar
1 cup bourbon
1 cup ketchup
1 package mini hotdogs or hotdogs cut into pieces

Pour brown sugar, bourbon, and ketchup into the slow cooker.  Mix until smooth.  Try to make sure the ketchup blends in with the other ingredients and the brown sugar is not in clumps.

Pour in mini hotdogs.  Cook for 8 hours on low.  Check every few hours and stir.  This prevents things from sticking on the bottom.


Stove top variation: Mix as above but in a pot over the stove.  Yep, the cook time is still hours; you want the sauce to be as absorbed as possible!

I've also found this sauce works well over other meats such as hamburgers, pulled pork, and the ever versatile chicken.  Here's to your team, and getting ready for the spring game.  Only 7 more months to go...

</sidebar>

Sunday, January 26, 2014

Dark Chocolate Cream Cheese Cookies

One of the most important questions in a relationship should be: what side are you on?  Hard or soft?  This simple answer can help settle disputes and ensure that there is domestic happiness for years to come.  You could try to take the middle ground if you like being uncooked.  Conversely, this is one debate where the middle ground is the best option.
Straight out of the oven, you can't tell the difference.
<http://www.kingarthurflour.com/blog/2011/11/16/soft-and-chewy-vanilla-orange-cranberry-cookies-homerun-for-the-holidays/>
While I truly fall in the middle ground of hard vs. soft cookies, nothing beats a soft cookie after the initial scarfing/burning of eating cookies right out of the oven.  You have to be very careful that you don't cook the cookies too long, otherwise they get hard. While I'm a huge proponent of just popping them in for a quick "warm", there are other short cuts that you can take to make sure you're not biting into a crumbling disappointment when sneaking a cookie a few days later.
I think you know where this is going.
The answer comes in the form of cream cheese.  This keeps the cookies nice and moist after the golden period of time right after they come out of the oven.  This keeps the cookies soft in time for you to bring them to your favorite bartender.


Ingredients - inspired by Pumpkin Chocolate Chip Cheesecake Cookies by Couponing & Cooking


  • 10 tablespoons of butter
  • 8oz. of Philadelphia Pumpkin Spice Cream Cheese
  • 1 egg
  • 1 cup of sugar
  • 1 teaspoon vanilla
  • 2 cups of flour
  • 1/2 teaspoon baking powder
  • 1/4 teaspoon baking soda
  • pinch of salt
  • 1 cup of chocolate chips
  • - See more at: http://www.couponingncooking.com/2013/09/pumpkin-chocolate-chip-cheesecake.html#sthash.M0i7fYr8.dpuf


  • 10 tablespoons of butter
  • 8oz. of Philadelphia Pumpkin Spice Cream Cheese
  • 1 egg
  • 1 cup of sugar
  • 1 teaspoon vanilla
  • 2 cups of flour
  • 1/2 teaspoon baking powder
  • 1/4 teaspoon baking soda
  • pinch of salt
  • 1 cup of chocolate chips
  • - See more at: http://www.couponingncooking.com/2013/09/pumpkin-chocolate-chip-cheesecake.html#sthash.M0i7fYr8.dpuf


  • 10 tablespoons of butter
  • 8oz. of Philadelphia Pumpkin Spice Cream Cheese
  • 1 egg
  • 1 cup of sugar
  • 1 teaspoon vanilla
  • 2 cups of flour
  • 1/2 teaspoon baking powder
  • 1/4 teaspoon baking soda
  • pinch of salt
  • 1 cup of chocolate chips
  • - See more at: http://www.couponingncooking.com/2013/09/pumpkin-chocolate-chip-cheesecake.html#sthash.M0i7fYr8.dpuf
    10 tablespoons of butter

    10 tbsp butter, softened
    8oz Philadelphia Snack Delights Dark Chocolate Cream Cheese
    1 egg
    1 cup sugar
    1 tsp vanilla
    2 cups flour
    1/2 tsp baking powder
    1/4 tsp baking soda
    pinch salt

    Preheat the oven to 350.  Beat together egg, sugar, vanilla, and cream cheese until smooth.


    Add all dry ingredients and mix thoroughly.

    Drop the cookies on a baking sheet.  I used a cookie stone, and a cookie sheet with parchment paper.  Bake for 10-12 minutes
    Sidebar: let's talk baking sheets.  I've discovered that cooking on a stone vs a cookie sheet produces a more fluffy cookie.  This keeps softer longer, and the bottom isn't as dark.  While cooking a chocolate cookie, that's not as big of a deal, but on sugar or pumpkin, it sure helps make you look like a pro.  I highly recommend using a stone whenever you have a chance.  Even if it doesn't look like you'll ever be able to get it 100% clean again. :)
    Right: from a stone.  Left: from a sheet.
    </sidebar>

    Friday, January 10, 2014

    Gift Kit: Easy Like Sunday Morning

    After a long Friday night-Saturday of experiencing the weekend to the fullest, sometimes a Bloody Mary isn't enough to shake that feeling of restlessness.  The "have I done enough with my weekend" feeling that never really goes away if you think about it for too long.  And the conquering of the next day goes best with grabbing a cup of coffee, tea, or hot cocoa.  With a towel and a coaster to prevent catastrophes of course.


    Components
    Cappuccino Mug
    Hot Chocolate on a Stick
    Printed Tea Towel
    Coasters
    Coffee-Scented Candle
    Fun Straws
    Tea Bags
    Biscoff Biscuits
    Emergency Chocolate

    Personalized Cappuccino Mug

    When I was in Italy, I got used to drinking 2 cappuccinos a morning.  The first day, my right leg about shook itself off my body.  By the last day, the second cup was what I needed to get through the rest of the caffeine free day.  Now, in my defense, these were European portions, not the huge cups I found for this kit.  Two cups this size and I would have been able to climb up and down those hundreds of steps along the Amalfi Coast... twice.


    Materials - from Kate's Creative Space's Primal Instincts
    Ceramic Cappuccino Mug
    Chalkboard paint - black or contrasting color
    Enamel paint - used sage green

    Trace or freehand draw a tea bag on the onto the mug using a pencil.  Or freehand for expert level crafting!  Fill in with chalkboard paint.  Let dry; and paint in the opposite direction.  Let dry for 24 hours.

    Paint on the string from the end of the tag into the cup.  Remember!  Don't wash in the dishwasher and be careful around the paint!


    Hot Chocolate on a Stick

    The puppeteer Jeff Dunham taught me you can put anything on a stick or "steek" and make it awesome, while the cake pop revolution taught me that virtually any food item on a stick makes it more tasty.  This is something sushi can claim partial hipster points for since it is eating using sticks.


    Ingredients - adapted from 30 Pounds of Apples's Hot Chocolate Sticks and King Arthur Flour's Cocoa Blocks
    1/4 cup heavy cream
    7oz (1/2+1/8 cup) sweetened condensed milk
    1 1/2 cups semisweet or bittersweet chocolate - melted
    6 tbsp cocoa powder
    2 tbsp oil
    1 tsp coffee - optional if the recipient likes coffee
    72 mini marshmallows
    wooden stir sticks/cake pop sticks

    Mix all ingredients minus the marshmallows together.  Pour mixture into silicone (simply for easier removal) ice cube tray.  Place 4 marshmallows in the corners of each cube & a stick in the center.


    Let sit in the freezer overnight.  Pop out and wrap in clusters.  Small tags with how to make hot chocolate on a stick are optional because it's much more entertaining to figure out how to make it yourself.  Personally I go for the "dissolving in saliva" method; it's emergency chocolate on the go.  Sticks really do make everything better!

    Printed Tea Towel


    Materials - from Brit + Co's DIY Neon Patterned Tea Towels
    Spray Dye
    Napkins or tea towels
    painters tape

    Iron and lay out tea towels.

    Tape out pattern on the tea towels.  I did a diamond and a tartan pattern.  Use up that painters tape.

    Spray the paint onto the towels.  I used 2 colors per towel: green and blue on the tartan tape, yellow and green on the diamond towel.

    Let dry for 4 hours.  Remove tape.

    Coasters

    I've already covered how to make bottle cap coasters and how to use alcohol ink for decoration (scroll to the section on "Coasters" - incredibly original).  If neither of those is what you're looking for in your gift kit, you can try the 3rd option in the flight: using washi or decorative tape on a tile coaster.  I see your challenge and I'm accepting it - you will find a coaster you like.

    Materials
    Washi tape
    Tile in white or complementary colors to your tape
    Sealant
    sugru, small rubber feet, or no-skid pads (4 per coaster)

    It couldn't be more simple: lay the tape however your heart desires across the tile.  Let a little overlap the edges.  Cut; I found using an exact knife worked well.  Seal.  Let dry.  Enjoy not marking your furniture.
    Examples of patterns
    I recommend designs that don't end with the tape in the middle of the coaster because it looks like you honestly forgot to finish extending the tape.  Plus your cuts have to be perfect, and that's quite annoying after awhile.

    Coffee-Scented Candle

    From the amount of times I use old votives in crafts, you probably getting the correct impression that I'm addicted to candles.  Extra drinks for you.  I had some ones in the new Glade 3oz design which unfortunately can't run through the dishwasher and masquerade as something new.  Curses, looks like I'll have to burn the midnight candle on repurposing those.


    Materials - from Henry Happened's French Vanilla Scented Candle
    3 oz votive
    Soy wax
    Wick with holder and glue
    Whole coffee beans
    Vanilla beans chopped or vanilla scent

    To fill these most votivey of votives, I decided that I wanted to perfectly replicate the smell of an easy Sunday morning all day long.  So much easier than trying to fire up the coffee maker, and grind the beans, and wait for the coffee... Makes me want to just eat a hot chocolate on a stick.  Or enjoy coffee porter.

    Extras

    In case you haven't figured it out yet, I'm confident the only shot that needs to be served in any situation is chocolate.  Preferably dark.  Just like my coffee.  And beer.  Rounding out a morning you can look forward to as much as the fun experience of the night before are tea bags of assorted teas and some Biscoff cookies. The world's problems can be solved with a simple supplement of these embodiment of goodness each morning.

    Putting it All Together

    Place items in cup & place in bag with newspaper as support.  Because they've been running around so much before, the recipient probably haven't had a chance to catch up on local news in their or your neighborhood.  Due to how this also is constructed, you can place the kit in box to wrap as well.  In the world of gift bags, it's nice to have something substantial to unwrap.  After assembly, enjoy 1 drink of choice as this gift is as easy as whatever day on which you've finished assembly.

    </sidebar>

    Friday, January 3, 2014

    Biscoff and Apple Cinnamon Rolls


    Breakfast is probably the best meal of the day.  Other meals are made better when you have breakfast again: brinner anyone?  Sidebar: this is discounting all the beers that are like chewing bread.  Arguably you can make a bread out of them and then have that for breakfast.  See?  The Bartender knows.
    Tattooed Martha - Hard Apple Cider and Cinnamon Bread (11)
    Apple Cider Breakfast Bread.  Are you not entertained?
    <http://www.tattooedmartha.com/2013/09/29/hard-apple-cider-and-cinnamon-bread/>


    The best breakfast is going to be birthday breakfast.  Where you get Cinnabons.  Because I have have yet to figure out any other justification for purchasing them.  Wait... 2 for 1 coupon.  Not without coups baby.  After combing though a bunch of of apple recipes I found one for apple Cinnabons.  Best ever!  Plus, I can get away with eating them on a regular weekend.

    Warning: this is not a scratch and sniff picture
    <http://en.wikipedia.org/wiki/Cinnabon>
    You're probably thinking the only way these could get better is if there was more cinnamon.  And you know, you'll always get what you ordered at this bar.  And I'll give you top shelf: melted Biscoff spread drizzled on the inside and, if you're really adventurous, over the top.  Double shot!

    Ingredients - Inspired by Caramel Apple Cinnamon Rolls by Gimme Some Oven
    Dough:
    1 cup milk
    1/4 cup butter
    3 1/2 cups all-purpose flour
    1/4 cup sugar
    1/2 tsp salt
    1 packet yeast
    1 egg

    Filling:
    1/3 cup sugar
    1/3 cup brown sugar
    2 tbsp cinnamon
    1-2 diced apples (I used Granny Smith)
    1/2 cup melted Biscoff spread

    Melt butter and milk in the microwave.  Usually it's easiest to pre-chop the butter and then just nuke for 20 seconds.

    Mix 3 cups flour, yeast, sugar, & salt.  Add egg and butter/milk.  Beat until combined.  Add rest of flour and mix until combined.

     Beat until dough starts separating from the sides of the bowl and forms a ball.  Cover with a damp towel and let rise for 10 minutes.

    Whisk together sugars and cinnamon for the filling.  Heat up the Biscoff spread.

    Roll out the dough into a rectangle.  Pour & spread the Biscoff over the dough.

    Sprinkle the apple chunks over the dough.

    Sprinkle the cinnamon sugar over everything else.

    Roll up the dough length-wise.  These form smaller, more pinwheel sized rolls.  If you want to get adventurous, you can roll up the dough width-wise.  Fun fact: you can use unflavored dental floss to cut rolls of dough.  Slide it under the roll, cross across the top, and pull all the way through the roll.  & you don't end up crushing the roll!

    Arrange the rolls in a greased pie plate, cover, and let rise for about 25 minutes in a warm place.

     Preheat the oven to 350.  Bake for 15-20 minutes until golden.  Let set for 5 minutes


    If you're really adventurous, drizzle some melted Biscoff over the finished rolls.  Enjoy with other breakfast essentials: eggs & smoked sausage!

    & yes, seconds are encouraged.  You have to start the day off right, am I right?  You don't want any left behind!  *stuffs face with cinnamon rolls*
    Round 2!
    </sidebar>