Showing posts with label gifts. Show all posts

Friday, October 3, 2014

USB Pendant Necklace

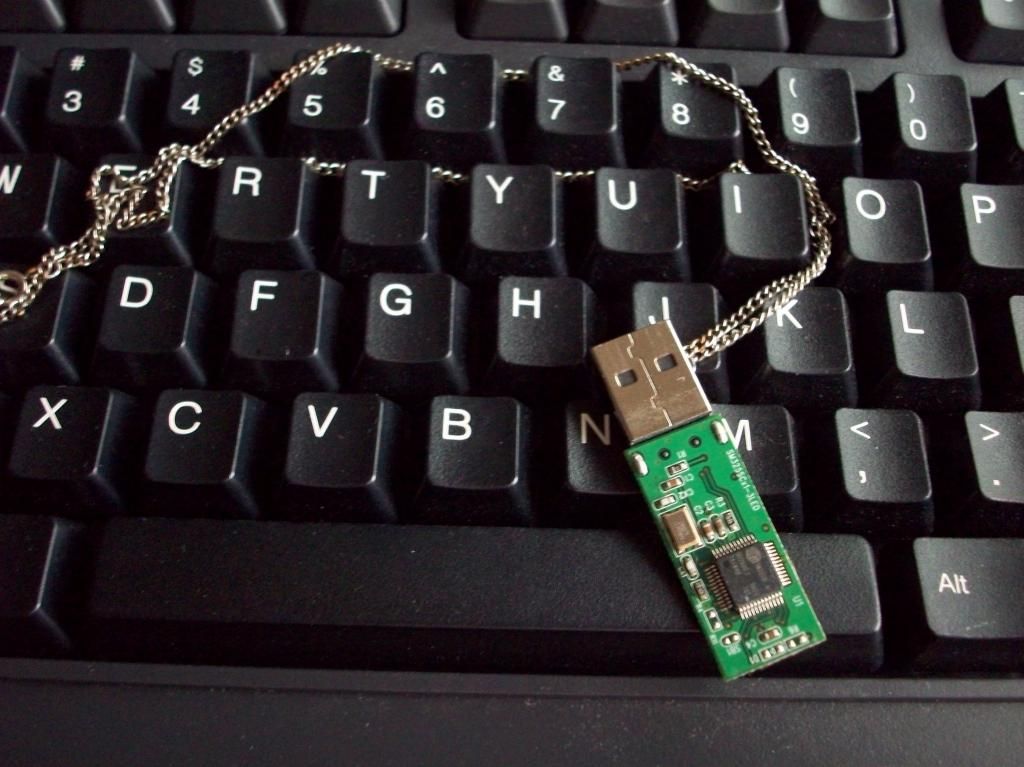
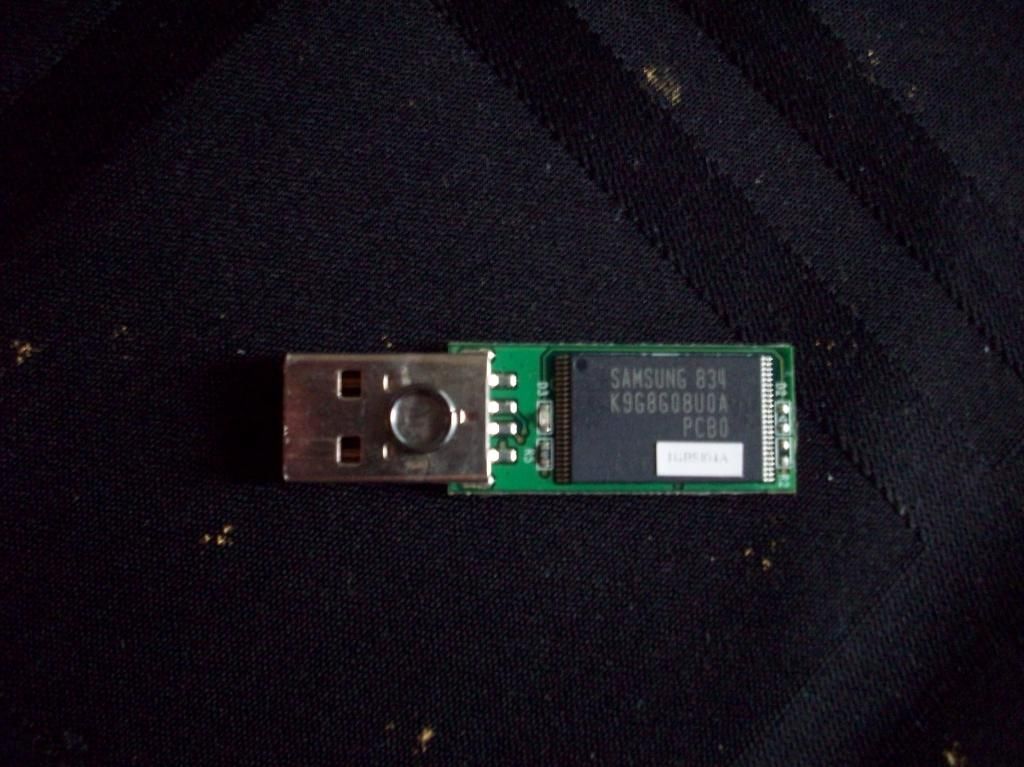
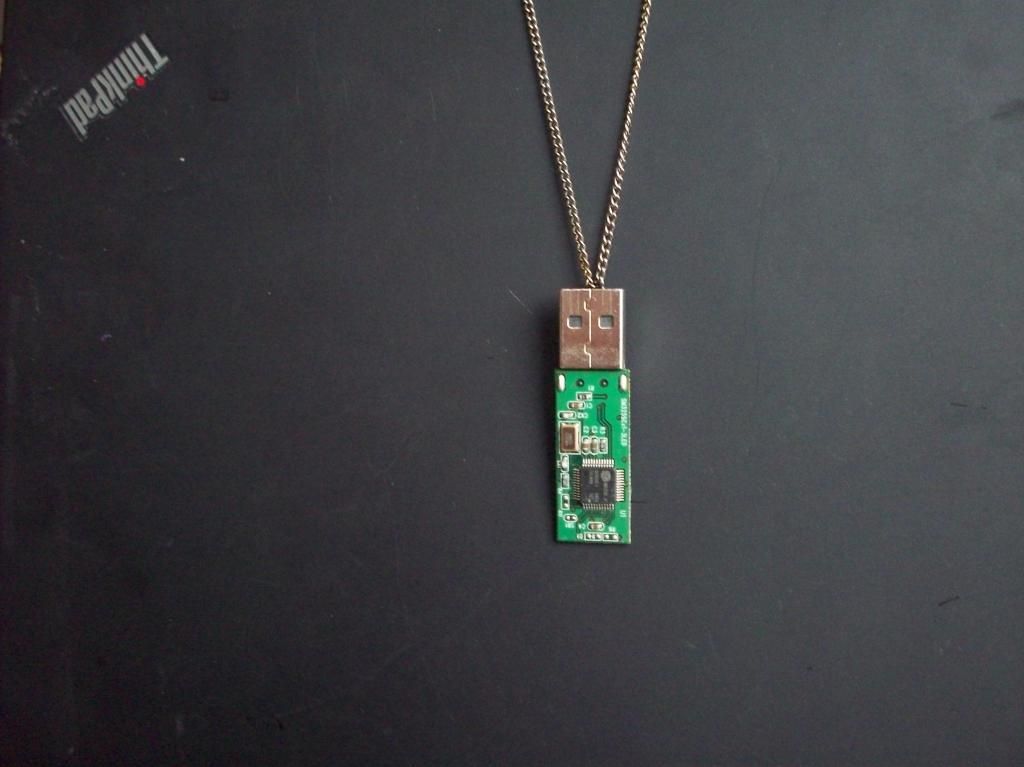
I'm convinced that whoever was talking about beauty being on the inside was talking about tech.  You can take your sleek aluminum casing, I want to see the guts!  The kelly green background to a swirl of silvers, tans, and flecks of resistor bands.  Look at this and tell me it's not cool:
You know you've seen this in a museum... of computer history
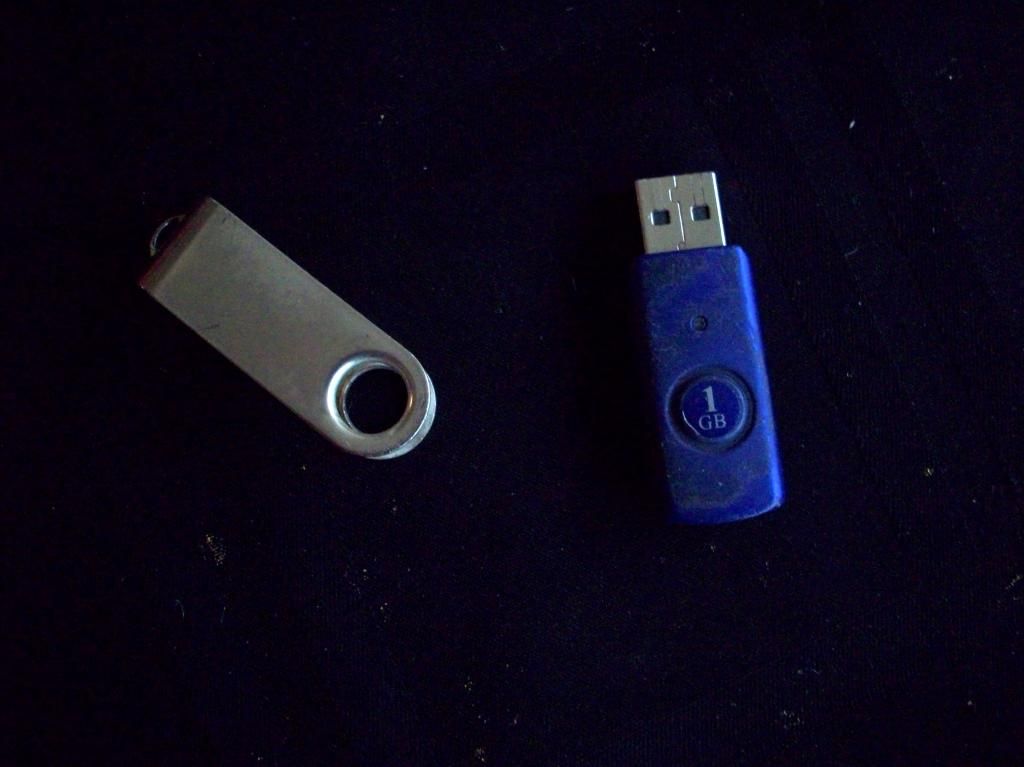
When my handy, dandy 1GB *dies laughing* drive died from being, politely put, "overexposed to adverse conditions", aka living on my keyring for 5+ years, I decided to pry it apart and squeeze just a bit more out of it.  Can USB drives be the next lemon?  You can use the pulp, juice, and zest?

Note: if lemon, do like Meatloaf and get your money back
Of course, you don't have to do this with a dead USB drive.  If you have something special, like some photos, a killer drink recipe, or your super secret spy program, you can also store on this device.  I don't know how it'll stand up to the elements, so make sure you have that drink recipe backed up.  It'd be a shame if the world was deprived of another great way to use gin.  *pours out a glass*

MaterialsUSB drive
2 jump rings - 6mm
chain

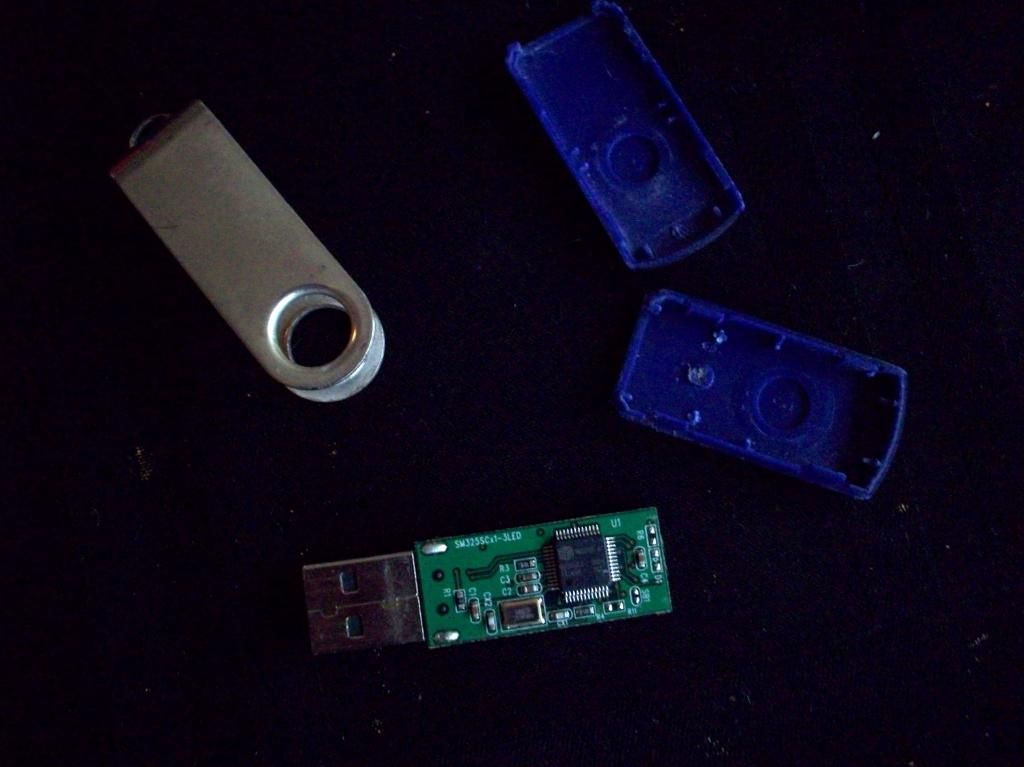
Take the casing off the jump drive.  Depending on how much "preconditioning" your drive has been through this could be really easy.  Use a flat head screwdriver or a small awl to get in along the seam if you're having problems.

We're going to loop the jump ring through the underside of the connector so the head is the new top of your pendant.  Make sure your jump ring will fit doing a visual check.

This will make it difficult to use as a drive, but meh, you can still get in by opening the jump ring.  Open and insert through the back loop.  Loop the other jump ring through the first.  This will keep the necklace lying flat.

Enjoy knowing that the beauty is now outside.  Now, go take apart something else to see what you can do with it!


</sidebar>

Friday, January 10, 2014

Gift Kit: Easy Like Sunday Morning

After a long Friday night-Saturday of experiencing the weekend to the fullest, sometimes a Bloody Mary isn't enough to shake that feeling of restlessness.  The "have I done enough with my weekend" feeling that never really goes away if you think about it for too long.  And the conquering of the next day goes best with grabbing a cup of coffee, tea, or hot cocoa.  With a towel and a coaster to prevent catastrophes of course.


Components
Cappuccino Mug
Hot Chocolate on a Stick
Printed Tea Towel
Coasters
Coffee-Scented Candle
Fun Straws
Tea Bags
Biscoff Biscuits
Emergency Chocolate

Personalized Cappuccino Mug

When I was in Italy, I got used to drinking 2 cappuccinos a morning.  The first day, my right leg about shook itself off my body.  By the last day, the second cup was what I needed to get through the rest of the caffeine free day.  Now, in my defense, these were European portions, not the huge cups I found for this kit.  Two cups this size and I would have been able to climb up and down those hundreds of steps along the Amalfi Coast... twice.


Materials - from Kate's Creative Space's Primal Instincts
Ceramic Cappuccino Mug
Chalkboard paint - black or contrasting color
Enamel paint - used sage green

Trace or freehand draw a tea bag on the onto the mug using a pencil.  Or freehand for expert level crafting!  Fill in with chalkboard paint.  Let dry; and paint in the opposite direction.  Let dry for 24 hours.

Paint on the string from the end of the tag into the cup.  Remember!  Don't wash in the dishwasher and be careful around the paint!


Hot Chocolate on a Stick

The puppeteer Jeff Dunham taught me you can put anything on a stick or "steek" and make it awesome, while the cake pop revolution taught me that virtually any food item on a stick makes it more tasty.  This is something sushi can claim partial hipster points for since it is eating using sticks.


Ingredients - adapted from 30 Pounds of Apples's Hot Chocolate Sticks and King Arthur Flour's Cocoa Blocks
1/4 cup heavy cream
7oz (1/2+1/8 cup) sweetened condensed milk
1 1/2 cups semisweet or bittersweet chocolate - melted
6 tbsp cocoa powder
2 tbsp oil
1 tsp coffee - optional if the recipient likes coffee
72 mini marshmallows
wooden stir sticks/cake pop sticks

Mix all ingredients minus the marshmallows together.  Pour mixture into silicone (simply for easier removal) ice cube tray.  Place 4 marshmallows in the corners of each cube & a stick in the center.


Let sit in the freezer overnight.  Pop out and wrap in clusters.  Small tags with how to make hot chocolate on a stick are optional because it's much more entertaining to figure out how to make it yourself.  Personally I go for the "dissolving in saliva" method; it's emergency chocolate on the go.  Sticks really do make everything better!

Printed Tea Towel


Materials - from Brit + Co's DIY Neon Patterned Tea Towels
Spray Dye
Napkins or tea towels
painters tape

Iron and lay out tea towels.

Tape out pattern on the tea towels.  I did a diamond and a tartan pattern.  Use up that painters tape.

Spray the paint onto the towels.  I used 2 colors per towel: green and blue on the tartan tape, yellow and green on the diamond towel.

Let dry for 4 hours.  Remove tape.

Coasters

I've already covered how to make bottle cap coasters and how to use alcohol ink for decoration (scroll to the section on "Coasters" - incredibly original).  If neither of those is what you're looking for in your gift kit, you can try the 3rd option in the flight: using washi or decorative tape on a tile coaster.  I see your challenge and I'm accepting it - you will find a coaster you like.

Materials
Washi tape
Tile in white or complementary colors to your tape
Sealant
sugru, small rubber feet, or no-skid pads (4 per coaster)

It couldn't be more simple: lay the tape however your heart desires across the tile.  Let a little overlap the edges.  Cut; I found using an exact knife worked well.  Seal.  Let dry.  Enjoy not marking your furniture.
Examples of patterns
I recommend designs that don't end with the tape in the middle of the coaster because it looks like you honestly forgot to finish extending the tape.  Plus your cuts have to be perfect, and that's quite annoying after awhile.

Coffee-Scented Candle

From the amount of times I use old votives in crafts, you probably getting the correct impression that I'm addicted to candles.  Extra drinks for you.  I had some ones in the new Glade 3oz design which unfortunately can't run through the dishwasher and masquerade as something new.  Curses, looks like I'll have to burn the midnight candle on repurposing those.


Materials - from Henry Happened's French Vanilla Scented Candle
3 oz votive
Soy wax
Wick with holder and glue
Whole coffee beans
Vanilla beans chopped or vanilla scent

To fill these most votivey of votives, I decided that I wanted to perfectly replicate the smell of an easy Sunday morning all day long.  So much easier than trying to fire up the coffee maker, and grind the beans, and wait for the coffee... Makes me want to just eat a hot chocolate on a stick.  Or enjoy coffee porter.

Extras

In case you haven't figured it out yet, I'm confident the only shot that needs to be served in any situation is chocolate.  Preferably dark.  Just like my coffee.  And beer.  Rounding out a morning you can look forward to as much as the fun experience of the night before are tea bags of assorted teas and some Biscoff cookies. The world's problems can be solved with a simple supplement of these embodiment of goodness each morning.

Putting it All Together

Place items in cup & place in bag with newspaper as support.  Because they've been running around so much before, the recipient probably haven't had a chance to catch up on local news in their or your neighborhood.  Due to how this also is constructed, you can place the kit in box to wrap as well.  In the world of gift bags, it's nice to have something substantial to unwrap.  After assembly, enjoy 1 drink of choice as this gift is as easy as whatever day on which you've finished assembly.

</sidebar>
Saturday, December 14, 2013

Adventure Go Bag

There's a recent TV add that brought up an excellent point a body at rest tends to stay at rest while a body in motion tends to stay in motion.  The only reason I'm able to remember or even see that commercial is I was trapped on the elliptical where it ran about every commercial break for the show I was "watching". The time I spent focusing and/or reflecting on that commercial was time I wasn't focusing and/or reflecting about how much I had to be on said elliptical.
Winter is Coming.... now back to our feature presentation.
<http://f2cbootcamps.com/3-common-workout-sins-for-fat-loss/>
I don't have arthritis, so while I can't support their main message, bear with me: my way-in-depth-analyzation-skillz show it does make sense. Who hasn't tried to come up with a grand idea of traveling somewhere, thinking of all the things to do when there, & then left it at that?  Body at rest.  Just as a passing thought as we go back to the trip we make every day: the chocolate stash.  Or the cream cheese stash.
Some of them are for emergencies... like, pumpkin?  That qualifies.
Sometimes all we need is a good push and the right equipment.  The habit of adventuring is much like sampling cookie dough: once you start, you can't stop.  Much like the level of sneak needed to get the cookie dough from under the nose of others who may be in the kitchen, you need the right equipment to get started without also figuring out how many different ways you can lay out a Target. "Go bags" are a collection of everything you need collected and easily at hand if you have to get moving right away in an emergency situation.  Power grid outages and the zombie apocalypse wait for no one.  I created this adventure version with a day trip of hiking in the mountains in mind & a magazine to spark future trips.  It's a good starting point and you can tweak as needed for your choice of destination.


Components
*Square Pack from Drifter Bags
Dark chocolate orange from Private Selection
*Topo Water Bottle - Yosemite from Liberty Bottle Works
2 emergency kits from Coleman
*Paracord
*Planters Nuts mix (granola + crasins + almonds + pistachios)
Aleve 50 75 count - I've seen this medicine work in ways I've never thought possible.  Miracle in a bottle, hands down
*Migraine Strength Excederin 50 count - hands down the best for headaches ever.  I carry a bottle everywhere with me.
*Included pouch from Drifter (oh yeah bonus camera case/emergency money pouch!)
*Go Escape travel magazine
*Bantam BHW pocket knife by Buck Knives
LED pocket flashlight from Coleman  (would have really liked to get a CREE made in the USA one, but those are neigh impossible to find in sizes below "tactical")
*Emerald cinnamon-roasted nuts

* - Made in the USA

That above asterisk is pretty important to me.  I happen to live in that awesome country where a lot of goods are still manufactured.  I even try to go one step further and buy local whenever I can; it's good to support your community since, well, that's where you chose to live.  And I figure everyone wants their community to be vibrant and booming.  Also, those products bring quirks to your area and make it a wonderful place to adventure itself!  I will so take my beer from all the local breweries in a to-go cup please!

All packed away.  I left the waterbottle in the box because I wanted the recipient to be extra surprised!
(it's the favorite national park!)
May the road rise to meet you.  Carpe diem!

</sidebar>

Wednesday, December 11, 2013

Gift Kit: Simple Girls Night Kit

No matter how old you get, there's nothing like a girls night that makes you appreciate the good things.  Like the grownup version of a sleep over where you talk about "boys/girls/romantic interest" (they still have cooties), work (isn't it funny how homework never really leaves you), and how your extracurriculars are going (how much sleep you're getting after rush hour).  However, one startling departure is everyone actually listens to their bedtime.
<pic complete kit in somewhat of a use>

Juice and snacks have been partially supplanted by wine and snacks that you get to pick out.  Even if they're the same snacks you had before minus the oatmeal raisin cookies.  No more will they masquerade as the superior oatmeal chocolate chip cookie.  Celebrate friendship and a night out-yet-in by supplying the hardware.  Cheers!


Components
Wine glass
Wine Charm
Cloth Napkin
Coaster


Wine Glass and Charm

You can always get incredibly fancy and paint the wine glass's base and use that as a marker so you don't accidentally (I see your "accidentally") drink out of someone else's glass.  I like to go the wine charm way because a) whenever I try painting it never turns out the way I want it to, b) I have lots of supplies for making wine charms holed up in various places around my crafting materials.  I made this really easy: just add some seed beads to a wire ring in different color patterns.  You can add a charm for personalization.  Or make some using shrinky dinks.


Cloth Napkin

Feeling classy with your wine?  You're already getting fancy with the charm.  Plus you need something with which to wipe up the crumbs of baked brie.  That was a bad example, you should never have crumbs of this god-like party food.  Maybe from... carrots.  Yeah, veggies.... *chews more baked brie*
Yeah I did it first.  My Bad...
Materials
pencil with flat eraser
blank cloth napkins
fabric paint

Using the rubber eraser of a pencil as a stamp, create rows of dots across the napkins.  For bonus points, measure how long each end of the napkin is and place dots evenly down the row.  Combo breaker: draw on a grid in pencil over your napkin and stamp the corners.  I went with option 1; the rows have "personality" even if a few of them are of someone who didn't have a firm grasp on the concept of straight.

I decorated this bag with the same pattern.  And I might have totally repurposed a Brit Kit for this.  Which is more fun: popcorn or wine?  Popcorn with beer is also an accepted answer.  I used the white chocolate for the covering of Irish Car Bomb Cake Balls.  Appropriate.

Coaster

Because putting the glass down on a nice wooden surface is the ultimate faux pas (It leaves a ring!  It's not even your furniture!  Coasters are the coolest!  Respect the bar!), if you're going to provide glassware, you should provide the accompanying coaster.  You can make some bottle cap coasters if you know the gals in question are beer or soda lovers.
Or Cheerwine lovers!
Or you can take ordinary tiles to new heights by using alcohol inks.  These work wonders with rubbing alcohol and non porous surfaces.

Materials
alcohol inks
white or light tile
rubbing alcohol
sealant (like ModPodge)
sugru, small rubber feet, or no-skid pads (4)

Pour a bit of rubbing alcohol on tile & spread around.  Before it dries, apply drops of color across the tile itself.  I went all of one color, then added the next 2.  Sometimes the later color would "eat" the space you thought you had for one of the first colors.  In that way I recommend not going overkill on the darker colors.
It spreads all over the place
After the ink dries, seal with the sealant.  Put feet into each of the corners or use the sugru to make small equal-sized balls for the feet.

Extras

Because nothing is complete without some emergency chocolate, put in your favorite candy bar.  Add some for this kit and it's complete!  You can wrap the wine glass in the napkin for some protection, or fold it nicely and place it in the glass


Bring gifts + good wine to your next event because you know as soon as these are opened, they're going to be put to good use.  & don't forget the brie.  & sampling it to make sure that this batch was good cheese.

</sidebar>

Tuesday, September 3, 2013

Heartstrings: Chalkborad String Heart


When one of my friends decided to ask his girlfriend to marry him, he decided to marry technology & friendship by shooting a video of all their friends giving fun and serious reasons why she should say yes.  
Better than this digital get down
<www.bigmoviezone.com >


I thought this was the best thing I've heard of for a proposal.  I was so excited because they are perfect for each other, and I can be a bit of a romantic occasionally.  Just a bit.  So when he asked me to contribute to the video (I do!!!!), I wanted to add a bit of my own personal touch to my 30seconds.  Show them some love!
We know the shape of their hearts.  It looks like corporate production.
<www.metrolyrics.com/backstreet-boys-ml-music-videos.html>

Whip something up that tugs on your heartstrings.  But not literally because we don't want to pull these nails out.


Materials:
Wooden Board - 9.5"x4"
Chalkboard paint
52 (edge) + 18 (heart) small, flat headed nails
red string 
heart template (optional)
chalk for writing message (option)

Paint the board with the chalkboard paint.  Let dry and condition.  I found that you can get things almost day-after-the-janitor-cleans-after-CCD clean by rubbing down with a paper towel. 

Every 1/2" around the edge, place a nail.  You theoretically could eyeball it, but where's the fun in that?  Says the girl who taped out 1"x1" squares on a table.

Draw or trace your heart in the center of the board.  I did it freehand, and one half always turns out better than the other.  Every time.  I'm told this can be rebranded as "rustic".

Do a simple loop around the frame to establish some rays out of the heart and the bottom layer of coloring.


Ok, time to make some random lines!  Like the Steelers String Art I did earlier: embrace the random.  It's like mowing the grass in Putt Putt Joins the Parade and if anyone gets that reference, you get free drinks for life.  *You Got a Friend in Me plays in the background*

Loop around the nails forming the heart one final time to add an edge for the shape.  Wipe the chalk out with a paper towel and I found that holding a small piece in tweezers helps too.

Because sometimes in this crazy world it seems like nothing makes sense, but in some cases nothing couldn't be more clear.


</sidebar>

Friday, June 14, 2013

Gift Kit: 1-2-3-Teach!

I'd think the 3 biggest bar nights of the year in the States are: St. Patrick's Day, Cinco de Mayo, and the day before spring commencement.  Unless you're in Michigan where you'd have to account for the day before Thanksgiving.  You could argue that they're giving thanks for the bartenders that care for them throughout the year, and that help them "remember" the recipe for the best Bloody Mary that they'll be making the next morning while splashing a bit into the stuffing.

I'm sure in the morning you actually look like Bloody Mary as well
<http://partypipes.com/bloody-mary/>
Amongst these graduates opening their hung-over-from-college eyes, are several that will join the next wave of the people that helped get them there.  Yes, these wonderful, tolerant, generous, sweet, and currently enjoying the first summer break from the other side of the desk people are collecting their red pens and gearing up for the start of the new school year.  I have a great deal of respect for teachers; anyone who is willing to deal with a) small children, b) bratty tweens, and c) entitled and lazy teenagers is under appreciated within our society.  The last thing most young people do is want to learn, and a lot of what school teaches you is only understood later.  The ones that teach for the passion of learning and for the children are some of the most valuable shapers of society. </soapbox>
This is about how old I sound right now.  Next they'll be getting on my yard.  I'm so crotchety I didn't pay for the picture :P
<http://www.shutterstock.com/pic-1509878/stock-photo-yelling-old-man.html>
For more about the state of education today, you can peruse Netflix's category with several documentaries on the subject that bring up problems from money to incentives to kids' behaviors.  Ok, really they're not all that bad, but there's always the one.... even in the "real world" there's alllllways the one.  Straight talk: teachers bring in a lot of their own stuff to help create the classroom environment to encourage learning and discovery of the world's secrets.  I'm sure that everyone has a teacher they remember from school.  A tall drink says they brought in their own stuff.

90% funded out of the generosity of their hearts and 100% reused for years
<http://mrsleeskinderkids.blogspot.com/2011/08/my-sisters-second-grade-classroom-pics.html>

So, we're putting together a graduation gift kit for those awesome new teachers that will get some essentials for all levels and the flexibility to customize per grade level.  These are a few of the basics that will free up your new teach to get specifics based on curriculum.  Congrats new grads and welcome new teachers!

Elements of this gift kit:
+ Pens - black/blue/red  --  highly recommend going the crafty route with the clay covered pen tutorial from Creative in Chicago.  I made a few and use them all the time at work!
+ Sharpies - multiple colors for multiple reasons!  "All teachers need sharpies" - an old pro
+ Sticky notes - you can never have enough sticky notes.  Ever.  I got 2 because one had funny sayings on it and everyone needs a partial to do list on a sticky note.  You can usually find fun ones at Fred & Friends.
+ Journal - notes for the day and other teacherly commentary
+ Page Flags - mark places in the text book or other
+ Paper clips - get to gradin!
+ Desk Bin - for holding kit
+ Target Gift Card - the universal Teachers' Mart
&&& the most important & appreciated element: emergency chocolate

I got pretty much everything here from Target.  Because you get me going in the dollar bin section and there's no stopping me.  What's nice is that meant that I was able to assemble a lot of things that were essentials & not feel like breaking the bank with the gift card.


Other things that teachers <3
Pencils - if you're bored of mechanical ones, and you've got a green thumb check out Sprout
Dry erase markers
Apples/apple related things  (yessss easy birthday gifts) :)
Magnetic clips for their chalkboards
Chalk
Badge holders
Watch - clip or wrist
Fun and indestructible bins of all sizes

If your teacher is mobile; I suggest getting a rolling cart or file cabinet cart to hold everything.  If you're really ambitious and the teacher knows he/she'd like a desk, check out some tutorials on nomadic furniture.  You yourself might learn a few tricks.  Education: the gift that keeps on giving.

</sidebar>

Friday, February 22, 2013

Turned Ice Cream Scoop and Pie Server

When you were a kid if you didn't scream for ice cream it was because you were lactose intolerant.  And even then you were screaming for a whole different reason: for the other dessert option.  As we got older, ice cream became the mustard of the dessert world; an excellent topping that goes with everything and if you ask for it, you got it.  Next to flambe, a la mode is the best French you'll ever see on a menu
Order a la mode flambe immediately
<http://livepretty.com/2011/12/29/a-new-years-eve-tradition-fire-ice-cream/>
The only downside of ice cream has to be how hard it can be coming directly from the tub.  There are about 50 million tutorials on how to serve ice cream as Pinterest would share with you, and they all come down to if you scoop, you need something industrial strength.  An ice cream scoop is the best way to deliver ice cream to the bowl/plate/your mouth without having to try to simultaneously support the spoon with which you're attempting to scoop the rock solid rocky road.
Chips do not have the structural integrity needed

A nice, good quality scoop will last you years, and look really nice in a kitchen as a display piece or when having a grown up dinner party.  Since most of these finer pieces look good in a set but never actually come in a set, it's really nice to be able to make your own.  At that point, you'll have the bonus condition of matching them to your kitchen.  Which, in some cases, is well worth it on it's own.
Desk Organizer
I'd try to make a joke about how bad it looks, but organized anything looks so right
<http://www.slowyourhome.com/2012/05/22/10-steps-organised-kitchen/>
I decided to turn two of these dessert utensils on my own in an attempt to practice different types of cuts as well as satisfy a sweet tooth.  Also, who can deny the fun of having wooden pieces in their kitchen, or ignore the chance to build up the emergency gift stash?  This will go along great with the Pizza Boss cutter.  Now you've got your work cut out for you.


Only part of the set you can purchase.
<http://www.thinkgeek.com/product/eaba/>


When I decided to start turning an ice cream scoop and pie server, I didn't realize it'd be so hard to find a pie server kit.  If you'd like one, head on over to Chefware Kits & you can find a ton of specialty pieces to fit all your wood turning needs.  After digging a bit it was the only place that carried them.  I also got a fish spatula thing because I had never seen one before and figured, what the heck, I cook fish all the time, this thing is awesome!  Otherwise, your local Woodcraft or other wood shop should fit the bill.  So you can now have your dinner and your dessert utensils match.  Good deal.


Materials:
Ice Cream scoop kit
Pie server kit
2 pieces of stock 1.5"x1.5"x6" (I used Kingswood)
Food Safe Wax
Epoxy or strong glue
Drill
Lathe

When doing any type of turning for pieces that will be or what not, you'll want to drill the hole first.  This is because when you start with the stock already cut, you already have a good idea where the center should be.  Granted cutting the hole is going to make it difficult to mount, but the hole will be centered so you should be good to go.  One of the easiest ways to find center on a piece of stock you know is square is to make an X on each end; the cross is the center.

Sidebar: one thing I find useful before turning all the main piece where you can't exactly put wood back after you've shaved it away, is to create a rough practice piece.  This piece is for you to figure out the shape you generally want and to get the cuts down that you're going to have to make on the real deal.  There are no take backseys in wood turning.  Also, ergonomics of a scoop can be taken into consideration here as you're making it your own!  Fit your own hand!  I found that you're going to want something to grip at the top, have it expand a bit into the main part of your fingers and contour down into the palm of your hand.

A bit like this
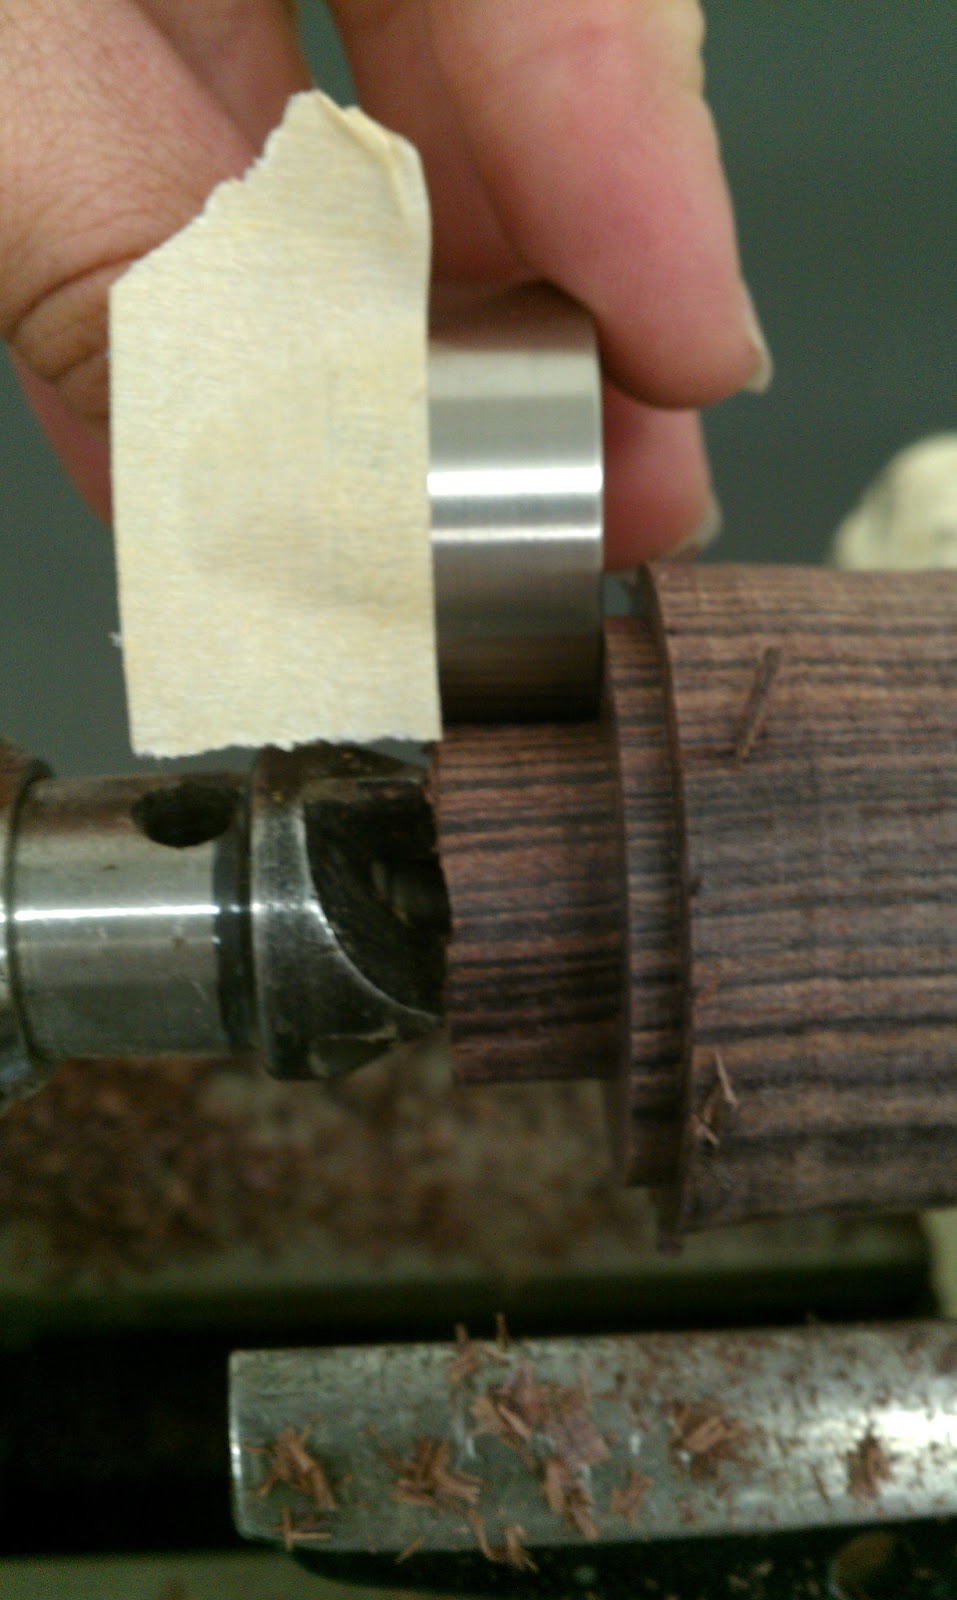
After you find what fits you best, you want to turn the actual piece.  Follow the included directions for the size and depth of hole to drill.  Mount the piece between centers and start cutting the top part for the ferrule.  You'll not to only measure the proper depth for a good fit,but a good size to account for whatever hardware also nestles down in there.  If this is the case, mark the difference in distance with a bit of tape and use that to compare to your piece on the lathe.

Check your piece often while turning it to make sure that you'll be able to hold it comfortably.  Here you can more clearly see the shape I was describing before.  Note the bottom is unfinished.

Action shot!


After you turn the top, you can spend your time customizing the bottom.  Just make sure you're satisfied before moving on.
Some examples of ends.  Bottoms up!


After you turn in, take sand paper to this sucker.  We're going to go with various grits up to 400 grit, no more than 100 at a time.  This will finish off the piece and provide a comfortable, smooth surface that is the hallmark of a finished piece.  Also it will feel better in your hands as you're digging into your pint of Cookies and Cream.  After sanding apply the wax and take off the lathe!

It's shiny!
 One of the really cool properties of Kingswood is not only it's unique smell while turning which transports you to a tropical paradise, is it's gorgeous grain that becomes highlighted when coated in wax.  Highly recommend using it.


And adding beads and coves highlights it to no end
 After finishing the turning, glue on the ferrules.  Let dry over night/as long as the glue says to.  You don't want these coming off as they protect the wood and add support to the head where all the stress takes place.


 After ferrules, assemble the rest of the hardware and also dry.  The ice cream scoop had to be screwed into the wood which took a lot of effort.  If it's too hard, take a bit of a sander and make the hole slightly bigger.  Not too much as you actually want the wood to be offering support for the scoop as well as the glue.

An actual workout
Now, go round up some ice cream and apple pie and enjoy your food in style!  Especially after you got the scoop assembled, you've earned it.


</sidebar>