Saturday, December 14, 2013

Adventure Go Bag

There's a recent TV add that brought up an excellent point a body at rest tends to stay at rest while a body in motion tends to stay in motion.  The only reason I'm able to remember or even see that commercial is I was trapped on the elliptical where it ran about every commercial break for the show I was "watching". The time I spent focusing and/or reflecting on that commercial was time I wasn't focusing and/or reflecting about how much I had to be on said elliptical.
Winter is Coming.... now back to our feature presentation.
<http://f2cbootcamps.com/3-common-workout-sins-for-fat-loss/>
I don't have arthritis, so while I can't support their main message, bear with me: my way-in-depth-analyzation-skillz show it does make sense. Who hasn't tried to come up with a grand idea of traveling somewhere, thinking of all the things to do when there, & then left it at that?  Body at rest.  Just as a passing thought as we go back to the trip we make every day: the chocolate stash.  Or the cream cheese stash.
Some of them are for emergencies... like, pumpkin?  That qualifies.
Sometimes all we need is a good push and the right equipment.  The habit of adventuring is much like sampling cookie dough: once you start, you can't stop.  Much like the level of sneak needed to get the cookie dough from under the nose of others who may be in the kitchen, you need the right equipment to get started without also figuring out how many different ways you can lay out a Target. "Go bags" are a collection of everything you need collected and easily at hand if you have to get moving right away in an emergency situation.  Power grid outages and the zombie apocalypse wait for no one.  I created this adventure version with a day trip of hiking in the mountains in mind & a magazine to spark future trips.  It's a good starting point and you can tweak as needed for your choice of destination.


Components
*Square Pack from Drifter Bags
Dark chocolate orange from Private Selection
*Topo Water Bottle - Yosemite from Liberty Bottle Works
2 emergency kits from Coleman
*Paracord
*Planters Nuts mix (granola + crasins + almonds + pistachios)
Aleve 50 75 count - I've seen this medicine work in ways I've never thought possible.  Miracle in a bottle, hands down
*Migraine Strength Excederin 50 count - hands down the best for headaches ever.  I carry a bottle everywhere with me.
*Included pouch from Drifter (oh yeah bonus camera case/emergency money pouch!)
*Go Escape travel magazine
*Bantam BHW pocket knife by Buck Knives
LED pocket flashlight from Coleman  (would have really liked to get a CREE made in the USA one, but those are neigh impossible to find in sizes below "tactical")
*Emerald cinnamon-roasted nuts

* - Made in the USA

That above asterisk is pretty important to me.  I happen to live in that awesome country where a lot of goods are still manufactured.  I even try to go one step further and buy local whenever I can; it's good to support your community since, well, that's where you chose to live.  And I figure everyone wants their community to be vibrant and booming.  Also, those products bring quirks to your area and make it a wonderful place to adventure itself!  I will so take my beer from all the local breweries in a to-go cup please!

All packed away.  I left the waterbottle in the box because I wanted the recipient to be extra surprised!
(it's the favorite national park!)
May the road rise to meet you.  Carpe diem!

</sidebar>

Wednesday, December 11, 2013

Gift Kit: Simple Girls Night Kit

No matter how old you get, there's nothing like a girls night that makes you appreciate the good things.  Like the grownup version of a sleep over where you talk about "boys/girls/romantic interest" (they still have cooties), work (isn't it funny how homework never really leaves you), and how your extracurriculars are going (how much sleep you're getting after rush hour).  However, one startling departure is everyone actually listens to their bedtime.
<pic complete kit in somewhat of a use>

Juice and snacks have been partially supplanted by wine and snacks that you get to pick out.  Even if they're the same snacks you had before minus the oatmeal raisin cookies.  No more will they masquerade as the superior oatmeal chocolate chip cookie.  Celebrate friendship and a night out-yet-in by supplying the hardware.  Cheers!


Components
Wine glass
Wine Charm
Cloth Napkin
Coaster


Wine Glass and Charm

You can always get incredibly fancy and paint the wine glass's base and use that as a marker so you don't accidentally (I see your "accidentally") drink out of someone else's glass.  I like to go the wine charm way because a) whenever I try painting it never turns out the way I want it to, b) I have lots of supplies for making wine charms holed up in various places around my crafting materials.  I made this really easy: just add some seed beads to a wire ring in different color patterns.  You can add a charm for personalization.  Or make some using shrinky dinks.


Cloth Napkin

Feeling classy with your wine?  You're already getting fancy with the charm.  Plus you need something with which to wipe up the crumbs of baked brie.  That was a bad example, you should never have crumbs of this god-like party food.  Maybe from... carrots.  Yeah, veggies.... *chews more baked brie*
Yeah I did it first.  My Bad...
Materials
pencil with flat eraser
blank cloth napkins
fabric paint

Using the rubber eraser of a pencil as a stamp, create rows of dots across the napkins.  For bonus points, measure how long each end of the napkin is and place dots evenly down the row.  Combo breaker: draw on a grid in pencil over your napkin and stamp the corners.  I went with option 1; the rows have "personality" even if a few of them are of someone who didn't have a firm grasp on the concept of straight.

I decorated this bag with the same pattern.  And I might have totally repurposed a Brit Kit for this.  Which is more fun: popcorn or wine?  Popcorn with beer is also an accepted answer.  I used the white chocolate for the covering of Irish Car Bomb Cake Balls.  Appropriate.

Coaster

Because putting the glass down on a nice wooden surface is the ultimate faux pas (It leaves a ring!  It's not even your furniture!  Coasters are the coolest!  Respect the bar!), if you're going to provide glassware, you should provide the accompanying coaster.  You can make some bottle cap coasters if you know the gals in question are beer or soda lovers.
Or Cheerwine lovers!
Or you can take ordinary tiles to new heights by using alcohol inks.  These work wonders with rubbing alcohol and non porous surfaces.

Materials
alcohol inks
white or light tile
rubbing alcohol
sealant (like ModPodge)
sugru, small rubber feet, or no-skid pads (4)

Pour a bit of rubbing alcohol on tile & spread around.  Before it dries, apply drops of color across the tile itself.  I went all of one color, then added the next 2.  Sometimes the later color would "eat" the space you thought you had for one of the first colors.  In that way I recommend not going overkill on the darker colors.
It spreads all over the place
After the ink dries, seal with the sealant.  Put feet into each of the corners or use the sugru to make small equal-sized balls for the feet.

Extras

Because nothing is complete without some emergency chocolate, put in your favorite candy bar.  Add some for this kit and it's complete!  You can wrap the wine glass in the napkin for some protection, or fold it nicely and place it in the glass


Bring gifts + good wine to your next event because you know as soon as these are opened, they're going to be put to good use.  & don't forget the brie.  & sampling it to make sure that this batch was good cheese.

</sidebar>

Sunday, October 20, 2013

Cheesy Chicken Taquitos

Sometimes you can have too much a good thing.  Even if that good thing started off in a small package.  After you shredded it into something much larger.
Like this big.
<http://www.brushmepretty.com/2012/02/tempting-tuesday.html>
After eating and celebrating and eating some more, there was easily over half of this dip left.  The accompanying pretzel bites however: gone.  Totally gone.  That is truly the testament of how good soft pretzels are.  And it's perfectly possible to have them whenever you want!  I'm raising a glass.

Woot!
<http://www.algonquinbooksblog.com/blog/beer-and-pretzels-and-football-and-books/>
However, the cheese dip has to be handled.  It's still staring at me and taunting a bit.  The spicyness of the cheese just begged for some other reincarnation and I was thinking Mexican.  And taquitos.  Because everyone loves taquitos.  They're the perfect for munching & for bar night part 2.  And it's great to also chew though the left overs in your fridge.


 Materials
Spicy Cheese Dip, approximately 2 cups or entire recipe from Baked Cheese Dip but Brush Me Pretty
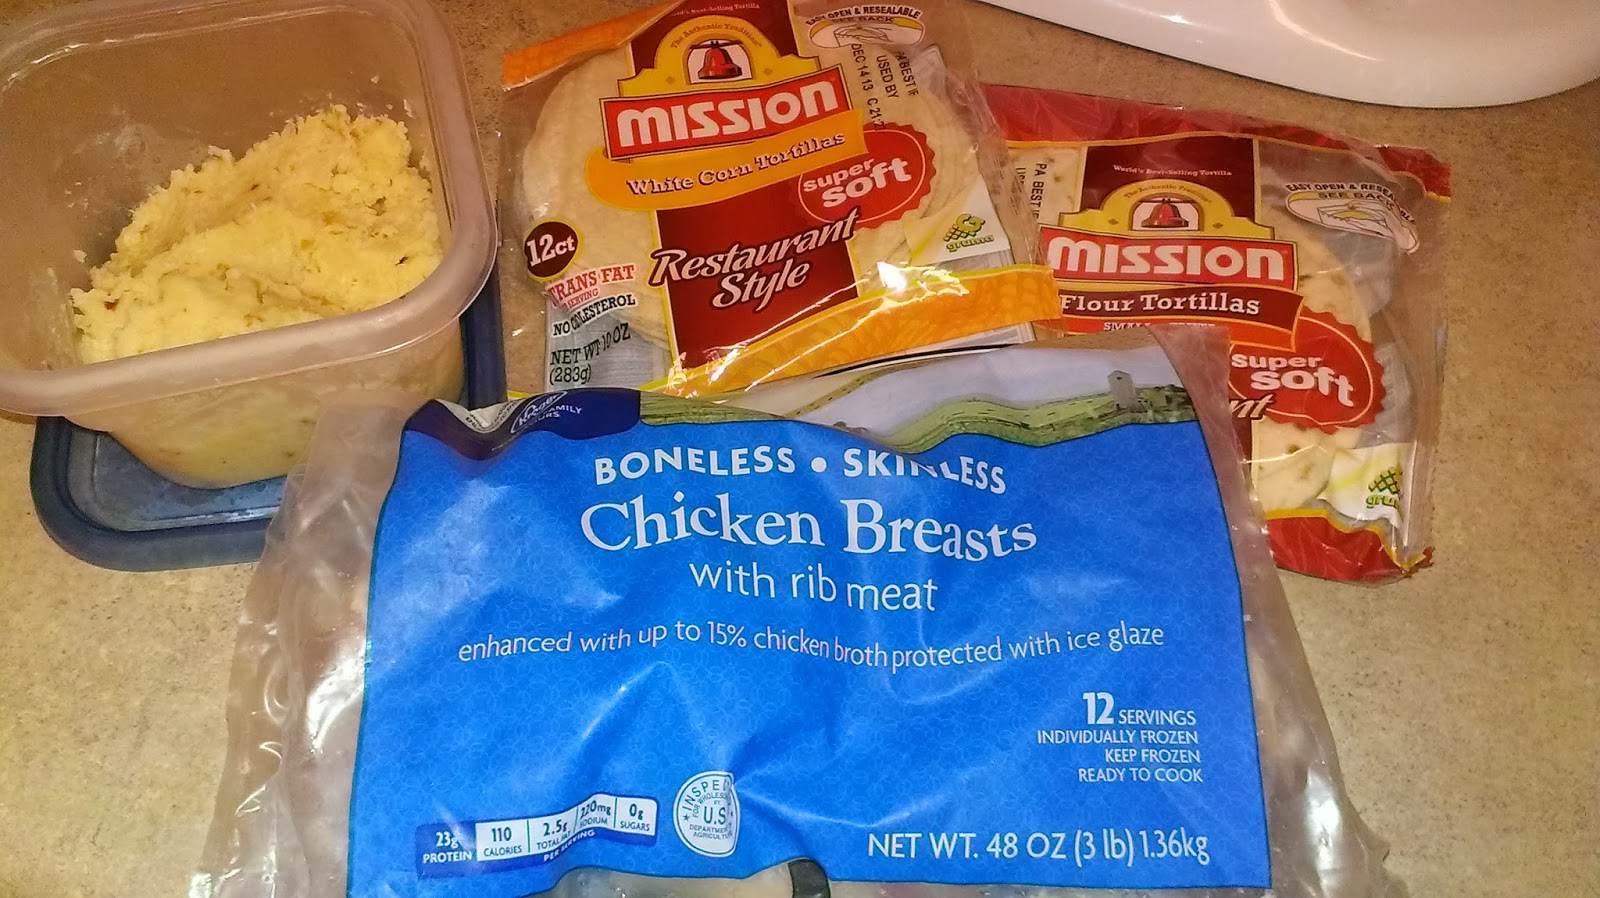
3, 3-4oz chicken breast pieces
10-15 mini tortillas
oil for frying

Cook the chicken!  All the way through.  Might take a bit... frozen over here

Make your cheese dip.  If you've been storing your cheese dip, heat it up now.  Shred the chicken.  I found it easiest to do it with a fork and knife in the bottom of a bowl.

Mix the chicken with the cheese dip.  Spread a bit on one of your tortillas.  I used about this much.

Fold one flap and then the other in a burrito style.  Lightly fry with oil in a skillet.

Test for a light golden brown color on each side.  You want it to be crispy!

I tried using corn tortillas and they kinda fell apart.  As I'm normally into flour, I'd say to stick with them.  Or maybe there's a corn tortilla technique out there.  I'd have to find it to be 100% sure.

Serve and dip into some tasty salsa!  Corn and flour alike.  Cheese and chicken extend beyond their simple containers.

</sidebar>

Sunday, October 13, 2013

Seatbelt Car Bag

Sometimes there's something that just looks so really cool and obvious that you wish that you had thought of it first.  And when it's using unusual materials it's even cooler.  The idea was a purse, and the material was seat belt webbing.
HOW DID I NOT THINK OF THIS!?!?!  Made in the USA. :)
<http://www.seatbeltbags.com/>

My huge weakness in accessories is handbags.  Or totes, pretty much anything that can be used to carry random things.  Because you should be able to carry a full pharmacy around with you at all times.  You never know when you might need something.  Like emergency cash.  For tipping your bartender!
cash-wad
This is approximately the amount you need.
<http://preppercentral.com/?p=1629>
However, the seat belt purse DIY was always just out of reach as I I'd have to go through the process of ordering the seat belt material.  Laziness or just not wanting the mailman to think that my place is a permanent stop on their route.  The junk yard closed so early that it was hard to go out there and cut them out of cars.  Which is fun, but a bit disruptive.  After a quick trip out to the Scrap Exchange, that all changed: there were seat belts!  I decided to start small with a trash can for my car to get everything sorted out


Materials
Seat belt webbing - 226" long
Basket Protector, Longaberger Small Boardwalk - optional
Stapler w/ staples
Lighter

I made all the measurements around the protector since I wanted a bit of extra support.  The protector is about 6" high and 24" around on the top.


Cut 3 strips to 24".  Seal the edges with the lighter.  Staple, or if you're really good, fuse the edges of the seat belt material together.

There are 2 separate sides: the longer sides which are juuuuust slightly lager than 2 inches wide.  And the wider side is about 4 seat belts straps wide. Cut 2 strips 20" long, 2 strips 16" long, and 1 38" long.

The 4 strips that go along the sides are laid out: 16 - 38 folded in half to form a loop - 16.

Weave the strips into a basket pattern.  Slide 3 bands up the 4 strips.  Staple the ends of the longer bands to the top band around.  This holds the bands in place as you go about weaving the ends.  Make sure that the seams are hidden behind the upright straps when you're weaving.

After you weave in the ends, staple the edges.  You don't have to keep these staples in; after we do this next step, you can pull them out!  Cut the last strip, or take what you have left, 24" and we're going to use this as our top edging.  This will be folded in half and sewn across the top.  You can use a sewing machine or do this by hand.

Start the edge on the inside of the handle.  The overlap will be covered or not seen from the outside of the bag.  Though this is a trash can, we're not going to be going for anything too fancy.  Also, I encountered some.... issues with the sewing machine.  It was a bit thick, so I finished it out by hand.  Meet the edges by the strap.

Add the protector with trashcan.  Place in car and be ready for some happy passengers.  Now they have somewhere to place all the fruit by the foot wrappers for post-car snack happiness

</sidebar>

Friday, September 20, 2013

Bottle Cap Coasters

If there was one grown up thing other than packing my own lunch that I've found I've weirdly gravitated to when older it's using coasters.  Seriously, there's nothing like protecting your own grown up coffee table (or someone else's!) that's important.
Now reminding you not to put the drink on your body.
<http://rlv.zcache.com/please_use_a_coaster_tshirts-rf72486aefff34c4db92c0293e800ee65_f0c50_324.jpg>
Also important: recycling!  More and more I'm seeing a bunch of crafts around reusing things and coming up with some clever tips to use everything from yogurt lids to the pull tabs on orange juice cartons. Though I'm not going to lie, I'm not really wanting to wash out your solo cup.  Even if "you can put it through the dishwasher!" *Pined*

Though this probably says it all
<http://craftsstalker.blogspot.com/2012/03/40-fun-toilet-paper-roll-craft-projects.html>
The most fun thing to recycle has got to be bottle caps.  I've even used them already to resurface the mini bar, and to remake a side table.  But it's not last call so there are always plenty more.  So since we're looking to open a few more cold ones, we're going to use the old caps to protect the furniture.  However, they can't protect from all the random dings that come from opening enough bottles to make the coasters possible.


Materials - yields 4 coasters
20 bottle caps, 5 per coaster
1 Box Epoxy Cast for jewelry (this means you won't die from fumes)
1 silicone soap mold 3"x3"
16 felt bumpers

Mix together your resin as directed on the back of the box.  I mixed together all of it as you actually use quite a bit to cover the bottle caps.  Plus filling the caps in since you don't want big holes in the back of your coasters.  Pour a small layer of resin into 4 of the molds just enough to cover the bottom & about 1/8 of an inch high.


 Let this cure until just solid, about 30 minutes depending on the temperature.  Check your instructions for how long to wait for your particular resin.  After this period of time, place the bottle caps face down into the mold.  This suspends the bottle caps in the resin.  fill over the bottle caps.


 Let cure for at least 24 hours; I let it cure for 48.  Pop out the coasters from the mold.  Look, your drinks are frozen in time!  Place felt bumpers under the 4 bottle caps in the corners so you can't see them from the top.

Acquire more bottle caps.  And keep your furniture looking sharp.  Potentially be the envy of your coworkers.


</sidebar>

Tuesday, September 3, 2013

Heartstrings: Chalkborad String Heart


When one of my friends decided to ask his girlfriend to marry him, he decided to marry technology & friendship by shooting a video of all their friends giving fun and serious reasons why she should say yes.  
Better than this digital get down
<www.bigmoviezone.com >


I thought this was the best thing I've heard of for a proposal.  I was so excited because they are perfect for each other, and I can be a bit of a romantic occasionally.  Just a bit.  So when he asked me to contribute to the video (I do!!!!), I wanted to add a bit of my own personal touch to my 30seconds.  Show them some love!
We know the shape of their hearts.  It looks like corporate production.
<www.metrolyrics.com/backstreet-boys-ml-music-videos.html>

Whip something up that tugs on your heartstrings.  But not literally because we don't want to pull these nails out.


Materials:
Wooden Board - 9.5"x4"
Chalkboard paint
52 (edge) + 18 (heart) small, flat headed nails
red string 
heart template (optional)
chalk for writing message (option)

Paint the board with the chalkboard paint.  Let dry and condition.  I found that you can get things almost day-after-the-janitor-cleans-after-CCD clean by rubbing down with a paper towel. 

Every 1/2" around the edge, place a nail.  You theoretically could eyeball it, but where's the fun in that?  Says the girl who taped out 1"x1" squares on a table.

Draw or trace your heart in the center of the board.  I did it freehand, and one half always turns out better than the other.  Every time.  I'm told this can be rebranded as "rustic".

Do a simple loop around the frame to establish some rays out of the heart and the bottom layer of coloring.


Ok, time to make some random lines!  Like the Steelers String Art I did earlier: embrace the random.  It's like mowing the grass in Putt Putt Joins the Parade and if anyone gets that reference, you get free drinks for life.  *You Got a Friend in Me plays in the background*

Loop around the nails forming the heart one final time to add an edge for the shape.  Wipe the chalk out with a paper towel and I found that holding a small piece in tweezers helps too.

Because sometimes in this crazy world it seems like nothing makes sense, but in some cases nothing couldn't be more clear.


</sidebar>